

A proper fuel sump check is one of the cheapest safety habits in aviation. It takes a couple of minutes, a small plastic tester, and a little patience, and it can catch the two fuel problems that quietly end flights: water and the wrong fuel. Here is how I approach it, step by step.
Why the Fuel Sump Check Matters
Water gets into fuel tanks through condensation, worn cap seals, and sometimes the fuel truck itself. Because water is heavier than avgas, it settles at the lowest point of the system, which is exactly where the sump drains are placed. An engine that is fed a slug of water does not run on it, and it may quit with no warning. Draining a small sample is how you find out before you leave the ground.
The check also supports your preflight duty under 14 CFR 91.103, which requires the pilot in command to become familiar with all available information about the flight, including fuel requirements. Always confirm the exact wording against the current FAA sources, and follow your aircraft’s own checklist and flight manual for where its drains are and how to use them.
The Tools You Need
You do not need much. A clear fuel tester, often called a sump cup, is the main item, and it should live in the airplane, not at home.
- A clear fuel tester with a probe that opens the drain valve and a clear body that lets you see the sample.
- A white card or sheet of paper to hold behind the sample, which makes color and debris easier to see, especially at night.
- A flashlight for dawn, dusk, and dark hangars.
How to Draw a Good Sample
Before you start, make sure the airplane is level and has been sitting for a bit. Fuel and water need time to settle after fueling, so if you just topped off the tanks, I like to wait and sample again. AOPA also suggests gently rocking the wings at the start of the preflight to shake loose water trapped by wrinkles or condensation, then sumping again near the end of the inspection.
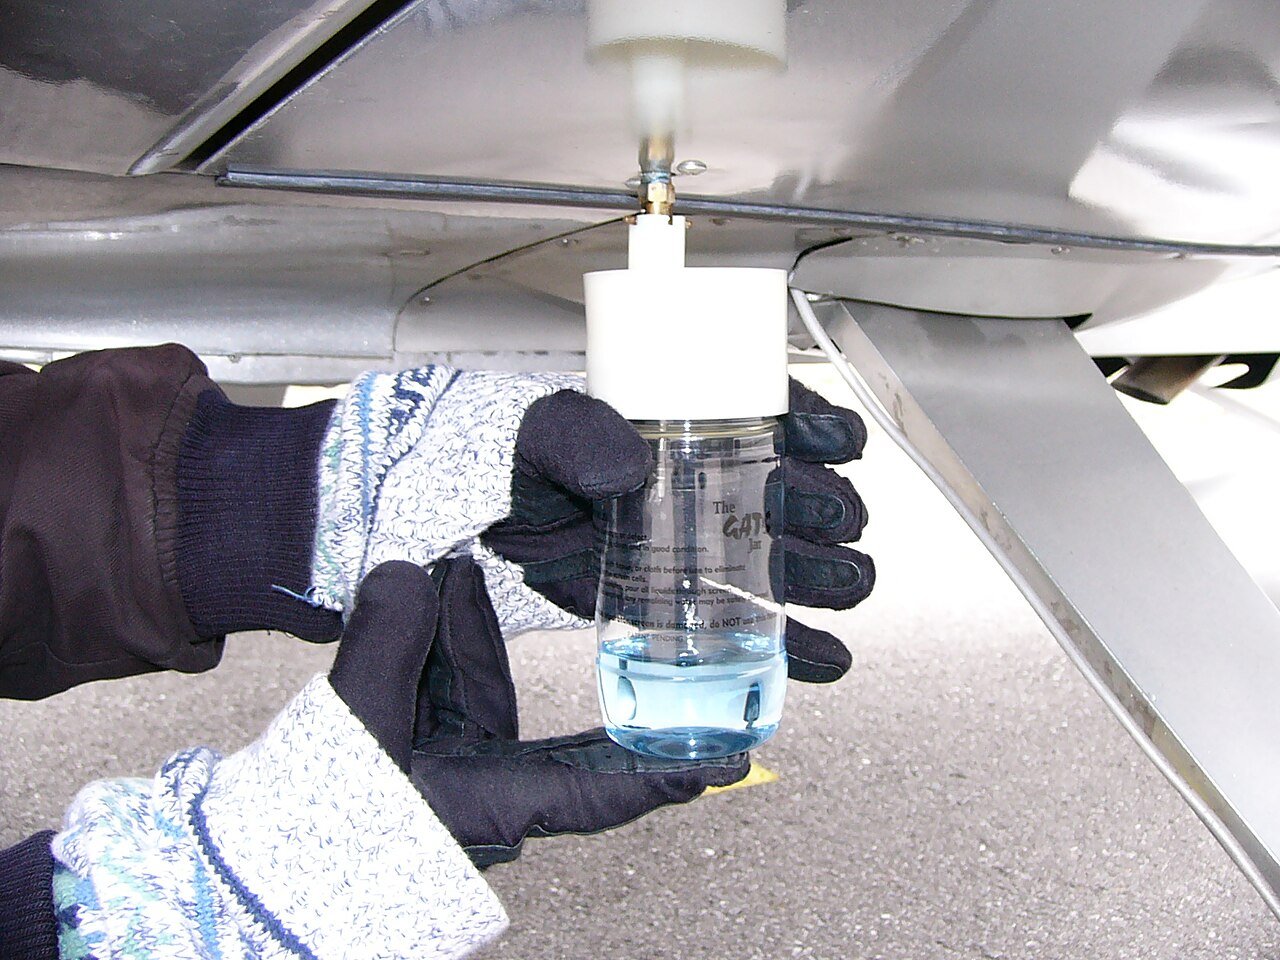
- Locate every drain listed in your checklist. Many airplanes have a drain at each tank and another at the lowest point of the fuel system, such as a gascolator or strainer.
- Push the tester probe against the drain and fill the cup.
- Hold the cup up to the light and look at the color, clarity, and anything floating or sitting at the bottom.
- Repeat until the sample looks clean, then check that the drain has fully closed and is not leaking.
- Dispose of the sample responsibly. Do not pour it on the ramp, and do not tip it back into a tank if it contained water.
What You Are Looking For
Clean 100LL avgas is blue and clear, and it has a strong avgas smell. Anything else deserves a second look.
- Water: it shows up as a separate layer or beads at the bottom of the cup, often with a visible line between the two liquids. On pavement, water beads up while avgas spreads out.
- Debris: dirt, rust flakes, or fibers mean the fuel system needs attention before flight.
- Wrong color or smell: a colorless or straw-colored sample, or a kerosene smell, can point to jet fuel in an avgas airplane, which is a serious problem.
- Cloudiness: haze can mean suspended water. Let the sample sit and see whether it clears.
Cold Weather and Humid Days
Seasons change the risk. In cold weather, water can freeze into tiny ice crystals that settle in the bottom of the tank and can block filters or stick a fuel selector valve. Sump the tanks before temperatures drop to freezing, and keep in mind that freezing can happen aloft even when it is warm on the ground.
On humid days, partly empty tanks have more air space for condensation, so keeping the tanks fuller reduces the surface area where moisture can form. Checking cap seals regularly is just as important, because a worn seal lets rain in.
When the Sample Is Bad
If you find water, keep draining the same sump until the sample comes up clean, then sample again after a short wait to make sure more is not working its way down. If it keeps coming, do not fly. If you suspect the wrong fuel, do not start the engine. Get a mechanic involved before the airplane moves.
It is also worth thinking about where the fuel came from. When I plan a cross-country, I check airport details in the Chart Supplement for fuel availability, and I decide in advance what my personal minimums say about flying with any doubt over fuel quality. New pilots preparing for the big day should also see our tips on a first solo flight, where a thorough preflight is part of the foundation.
Bottom Line
The fuel sump check is simple, fast, and it works. Take a sample from every drain, look at the color and clarity against a white background, and treat anything odd as a reason to stop. For more detail, read AOPA’s guide on checking fuel samples, and always follow your aircraft’s flight manual and current FAA guidance.

